Before & after - The Art of Editing
There’s a lot that goes on behind the scenes after a photo session. In fact, a lot of the magic takes place in the post-processing. This is only a part of what makes the difference between a snapshot and a fine art photograph.
As a photographer, it’s best to get everything right in camera. By that, I mean the exposure, composition and lighting. The more you do correctly in camera, the less work you have to do later.
But, having said that, almost all images need a little, and sometimes a lot, of tweaking, before going to print. To see what I mean, I’m sharing a little behind the scenes post-production of this image I captured of Xena last fall. The first photo is straight out of my camera.

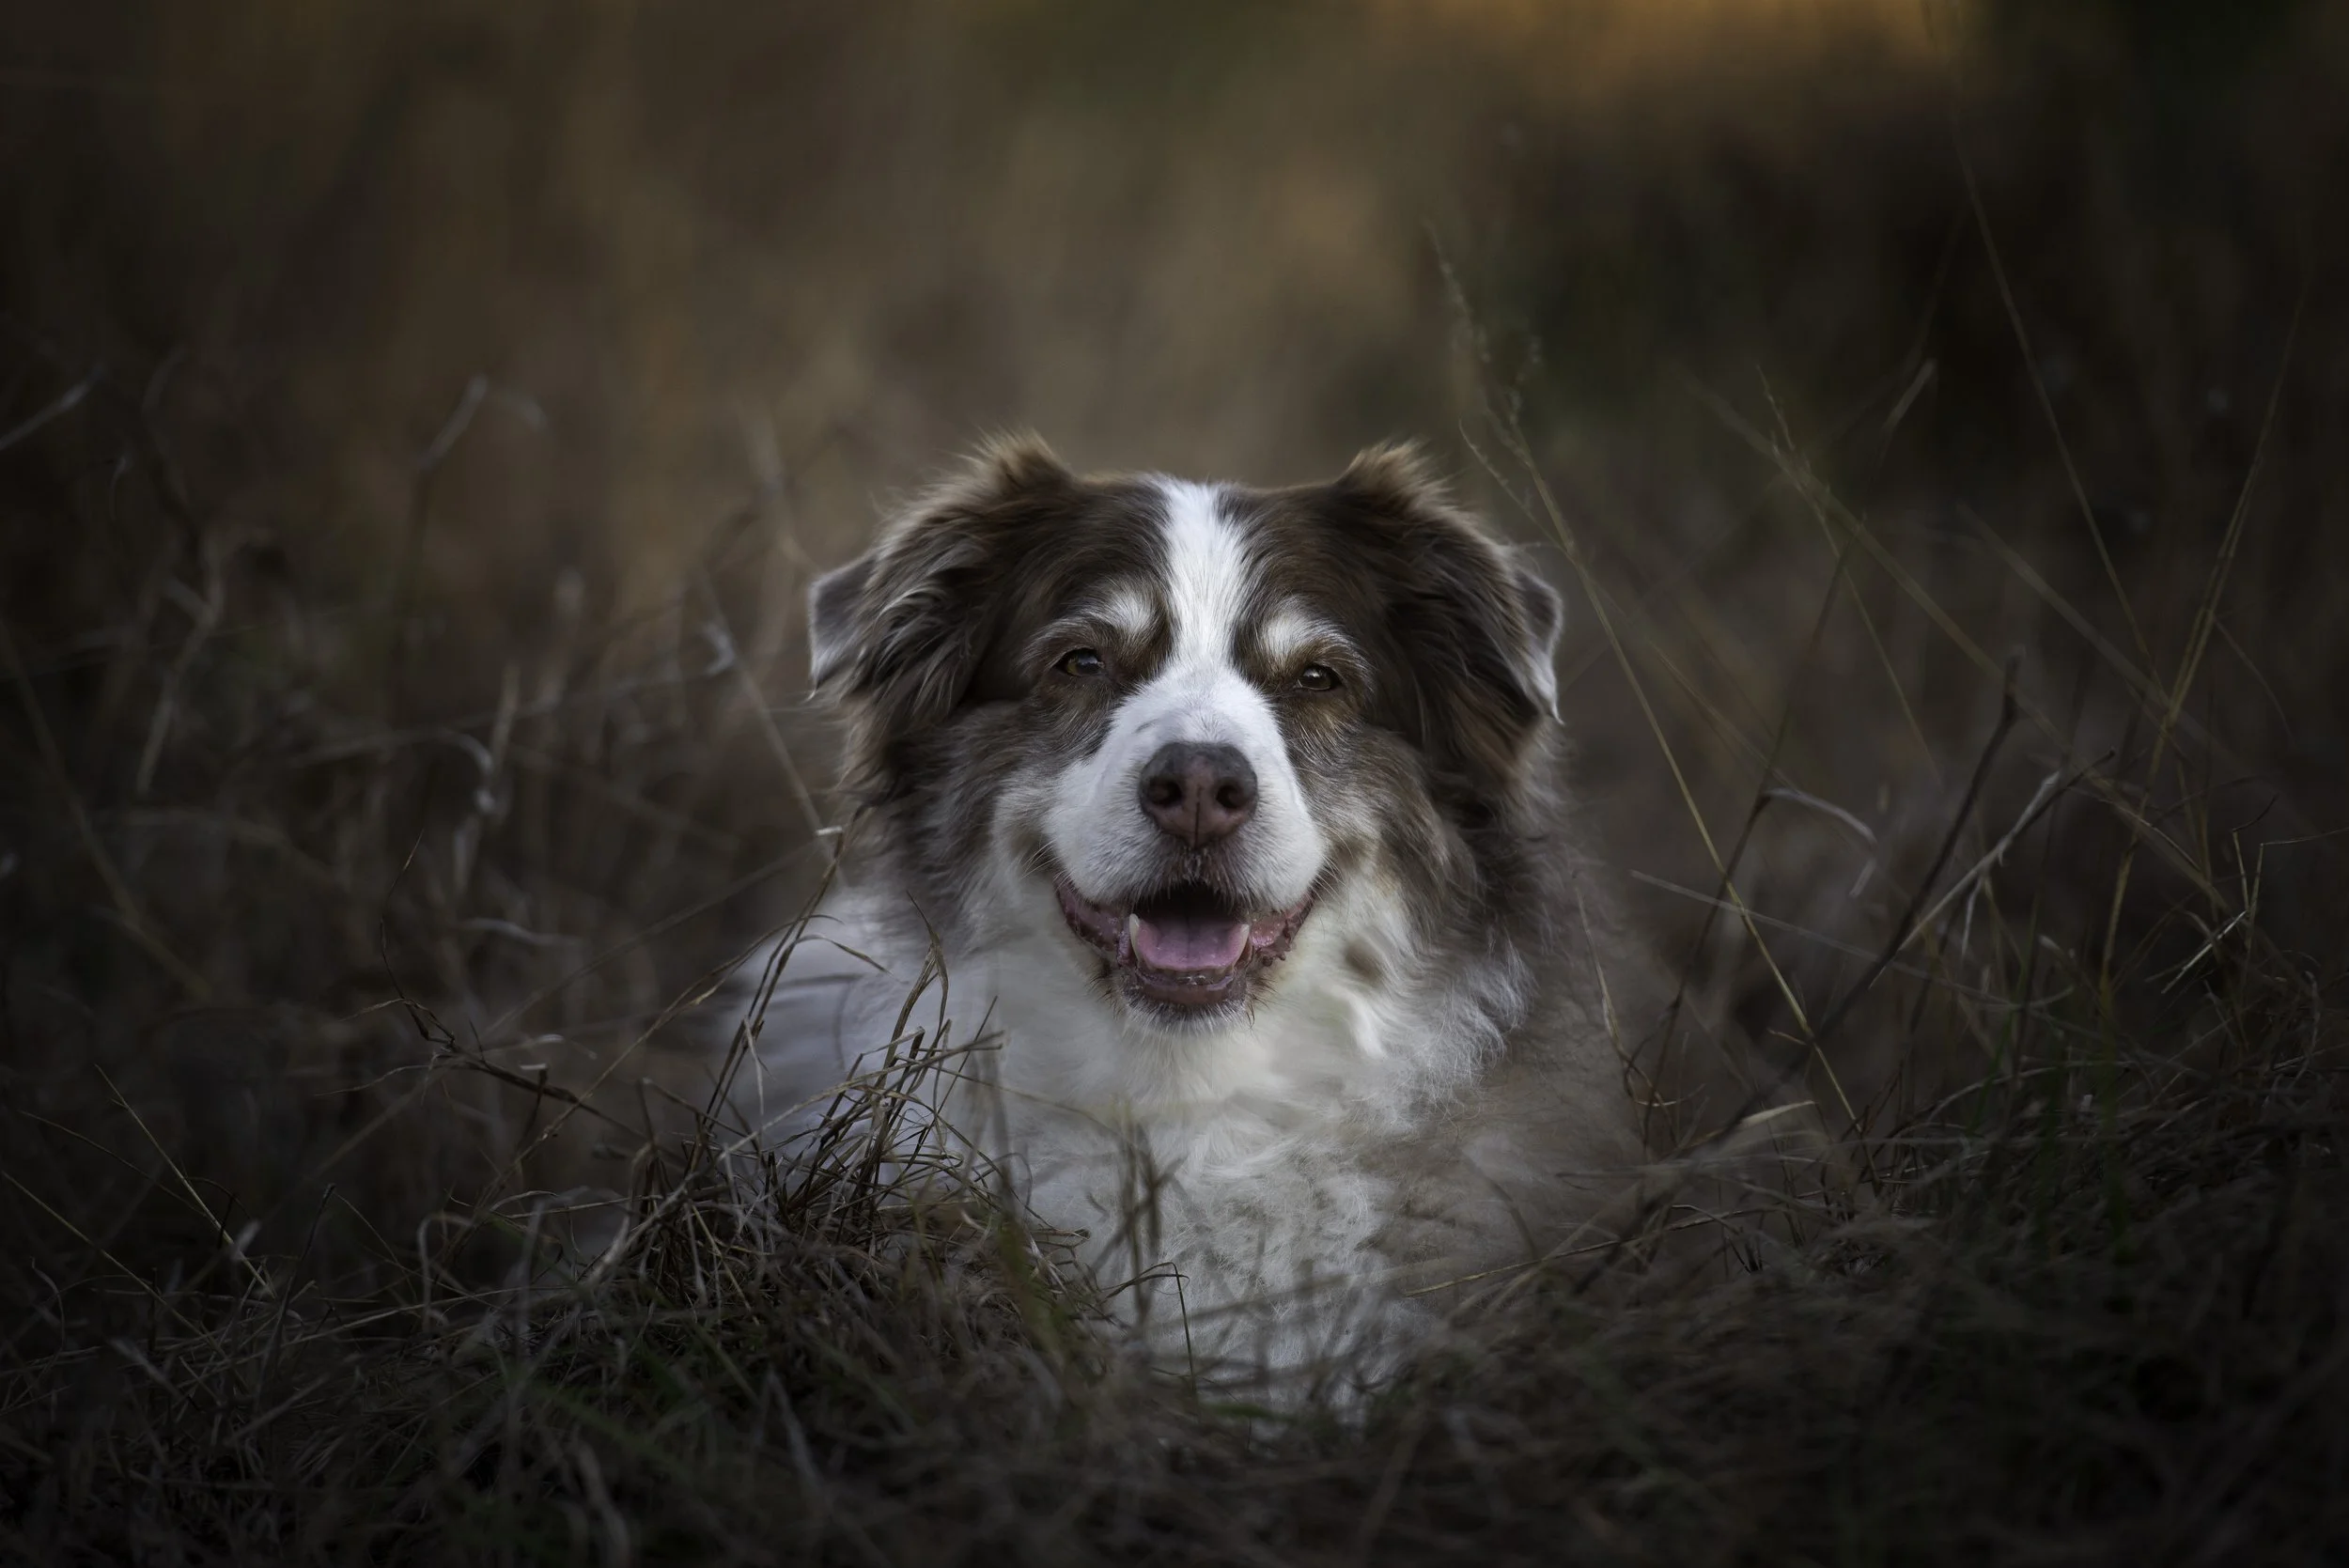
For this session, we went to this great little park near my home. I photographed Xena and her dog sibling, another Australian shepherd, Gracie here because it is a place they frequently go for walks. As I was photographing Gracie, I turned around to see Xena hanging out in the grass just like this watching us. She is very well trained, so her owner felt comfortable taking the leash off her. As an older dog, Xena doesn’t have an interest in taking off and running freely like she did in her puppyhood days.
I loved how the colors of the dead grasses and other foliage complimented Xena’s coat. So when I set my exposure, I made sure to retain all the details in the white of her fur. Once I got home and downloaded my images, I opened up Lightroom, made minor adjustments in the whites and warmed up the white balance. You can see the results in the second photo.

It looks better, but I know there’s even more I can do. I only use Lightroom to make small adjustments with highlights, shadows, exposure and white balance. Because no matter how hard I try, there are times I simply don’t get my exposure right in camera. Since I shoot RAW, I am able to access so much information and bring these details back.
With these basic adjustments made, I am ready to get to work. I don’t always have an idea in mind where I’m going with my editing. Sometimes I do and I go through the steps needed to create that vision. Other times, I just play around until I come up with something I really like.
With this image, I knew two things. One I wanted the color of Xena’s fur and the color of the foliage to be similar. I also knew I wanted much more contrast that what was captured in camera. The first thing I did was remove the grasses in front of Xena’s face. Then I warmed up the image even more, adjusted the color, and created more contrast before adding a vignette around the edge.
Photoshop allows me to use layer mask and with a brush, only “paint” in an effect on a part of the image. I know Lightroom has been updated to include this feature as well, but so far, I have been unable to master it. So I stick with what I know and am comfortable with.
The final image is below. What do you think? Do you like how it turned out?